Windows Admins usually have hard time managing MacOS systems. Are you looking to Upgrade or Install McAfee ENS (EndPoint Security) on Mac? If yes then this post will helps you. Here will outline the steps to Upgrade McAfee ENS from 10.5.x to 10.6.x version. But this method well suitable for fresh Installation too.
There are GUI and CLI based Installation methods. But you are free to choose your preferred method.
Note: The products discussed here are of enterprise types. Since you need to have valid grant number to download the products. And the guide provided here suitable for McAfee ePO environments.
Step 1 – Upgrade or Install McAfee ENS on Mac
Note: These steps are applicable for both new and upgrade Installation.
Download McAfee ENS packages (.dmg) from McAfee products download page. For Instance assume ENS version 10.6.5 to demo here.
Method 1 – GUI Installation
- Execute “McAfee-Endpoint-Security-for-Mac-10.6.5-RTW-standalone-115.dmg”
- Then the Installer dialog box let you choose ENS modules to be Installed. ENS modules are,
- ENE Threat Prevention
- ENS Firewall
- ENS Webcontrol
- Once choose the module follow on screen Instruction. Then wait for it to show “Installation completed” popup message.
- Proceed to Step2 to enable ENS services for first time.
Method 2 – CLI Installation
This is my favorite option. Because its simple and silent type Installation.
- Additional Install script needs to be downloaded for CLI Installation. Download appropriate deployer script from KB84772
- For ENS version 10.6.5 and later: Download product_deployment_2.0.zip
- For ENS version 10.6.4 and earlier: Download product_deployment_1.0.zip
- Secondly extract the downloaded archive. Then move deployer script to location where ENS package (.dmg) exist. Lets assume both are in Desktop itself
unzip -d ~/Desktop/ product_deployment_2.0.zip
$cd ~/Desktop/- Now do execute the script for Installation to happen. This is same in case of upgrading existing product to newer version.
--Syntax--
 $sudo sh product_deployment.sh <<ENS module code names>>

--Module codes--
TP - ENS Threat prevention
FW - ENS Firewall
Wc - ENS Web Control
For example, this command Installs ENS Threat prevention and Firewall modules silently.
$sudo sh product_deployment.sh TP FWIf Installation succeeds, message similar to below appears on terminal window.
installer: Installing at base path /
installer: The install was successful.
"disk2" unmounted.
"disk2" ejected.
Once completed proceed to Step2 to enable ENS services for first time.
Step 2 – User consent to Load ENS kernel extensions
Note: You might not need for this step when upgrading existing products
What is SKEL?
Ever since macOS High Sierra (10.13) Apple Introduced new security feature called Secure Kernel Extension Loading (SKEL). As this feature requires end-user consent to load any third-party kernel extensions that are installed after the installation of macOS.
Because of SKEL, the kernel extensions of ENSM Threat Prevention – on-access scan, Firewall, and Self Protection are not allowed to load without end-user consent. Hence user must manually authorize McAfee ENS kernel extensions. But this is only needed for very first time after a fresh Installation.
Until user provides consent McAfee ENS remains disabled. So to do that please follow these steps.
- After Installation finished (from Step1) wait for 10 mins.
- Since ENS kernel extensions will start loading automatically after 10mins of Installation.
- Due to which end user sees a McAfee Alert that prompts whether to allow the McAfee kernel extensions, from the Security & Privacy System Preferences pane.
Note: McAfee Alert re-appears every 30 minutes, until the user provides consent.
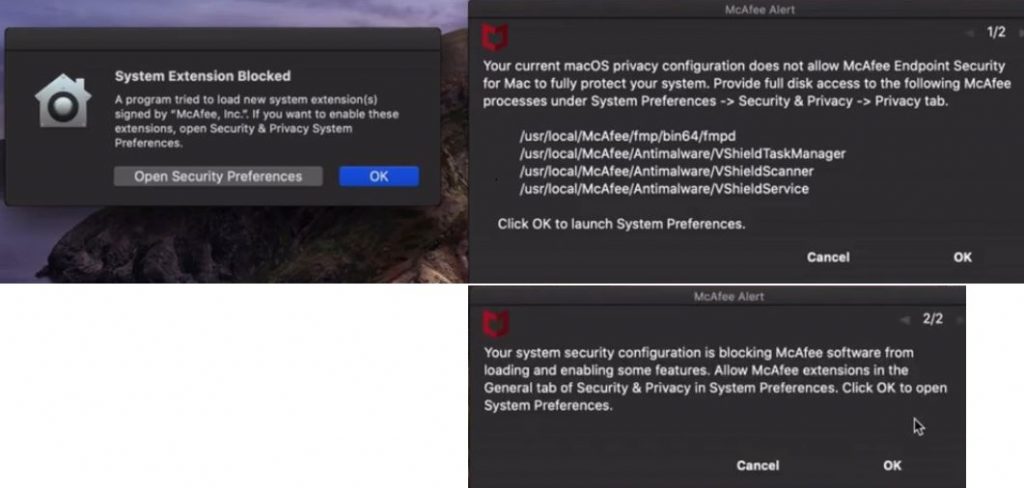
- To provide consent,
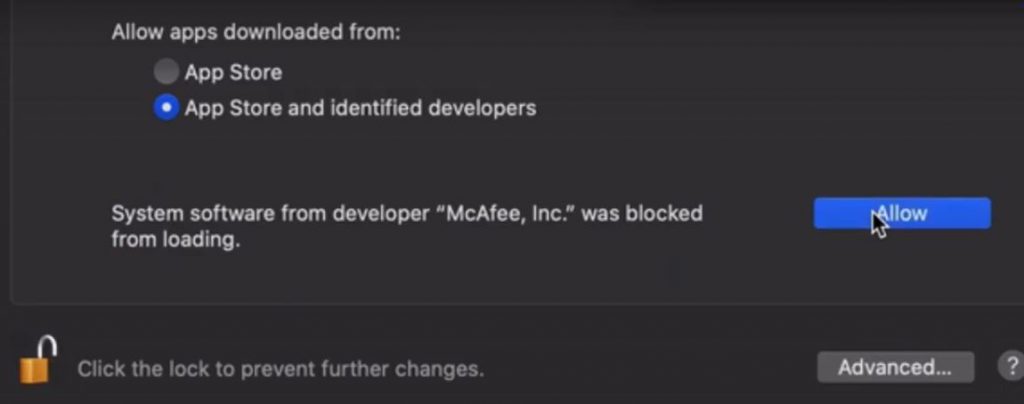
- Navigate to Apple menu -> System Preferences -> Security & Privacy -> General tab -> At bottom left corner click on lock symbol and enter password -> In the same “General tab” underneath press “Allow“
- As a result McAfee kernel extensions will get loaded
- Further on next policy enforcement, McAfee ENS services starts operating normally as per policy.
Step 3 – Allow full disk access to ENS Threat Prevention (TP)
Ever since Mac Mojave version (10.14), full disk access must be granted exclusively for services. In our case McAfee ENS services needs to be granted with full disk access. Otherwise ENS virus scanner will not be able to scan user protected files.
To provide full disk access,
- Navigate to Apple menu => System Preferences => Security & Privacy => Privacy tab => Choose “Full disk access” from left side menu list => At bottom left corner click on lock symbol and enter password => Click “Unlock“
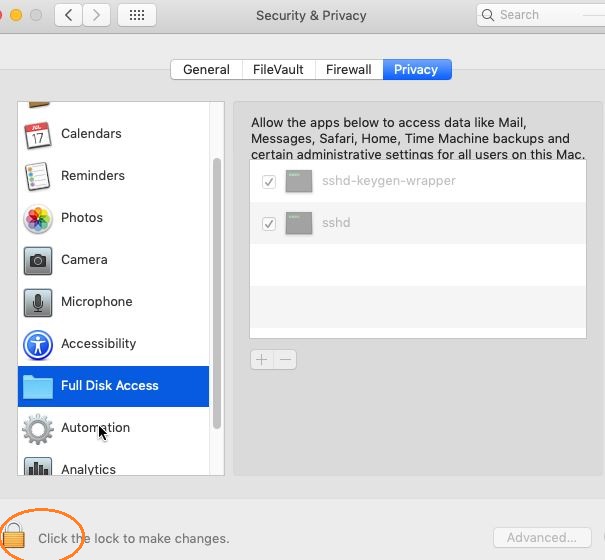
- All together should grant full disk access to following four McAfee ENS services
- AntiMalware/VShieldScanner
- AntiMalware/VShieldTaskManager
- AntiMalware/VShieldService
- fmp/bin/fmp
- Lets add first service, click on plus (+) symbol
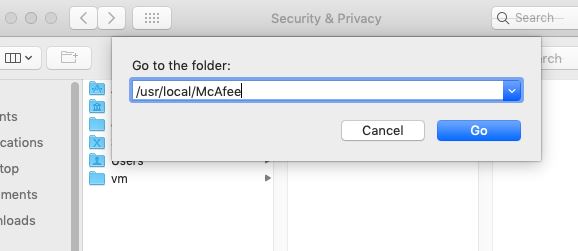
- Press the Command+Shift+G keys together to open the Go to the Folder dialog
- Type /usr/local/McAfee, and click Go
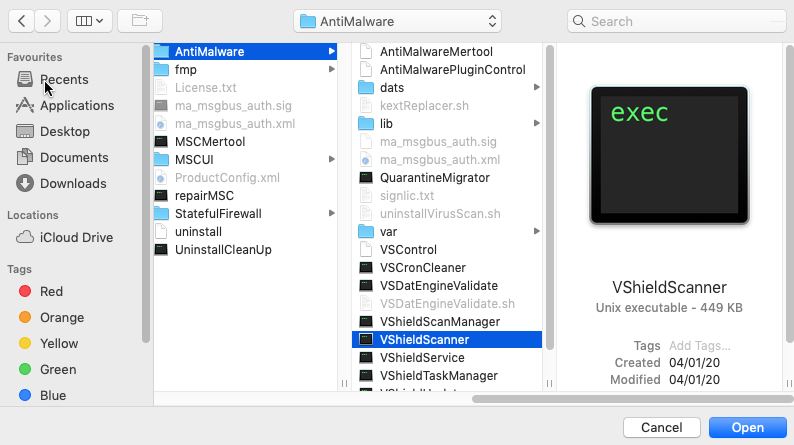
- Browse to the first McAfee component: AntiMalware/VShieldScanner
- Click Open to grant VShieldScanner Full Disk Access
- Similarly click (+) and browse to the second ENS service: AntiMalware/VShieldTaskManager
- Then click Open to grant VShieldTaskManager Full Disk Access.
- Likewise repeat above steps and add the remaining two ENS services
- /usr/local/McAfe/AntiMalware/VShieldService
- /usr/local/McAfee/fmp/bin/fmp
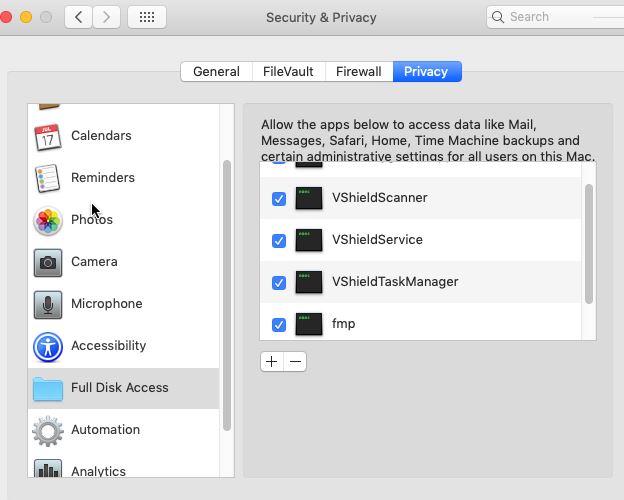
- After adding all of them, it should looks similar to the one shown in below picture.
- Note: In case any of the components are not shown in the window, do browse for that component again, and click Open. Also, make sure that each component has a blue check-mark next to it.
Still struck here? No worries, look at this article to know step by step process about adding services to full disk access – Enable-Full-Disk-Access-in-macOS-Mojave
References
Further high level McAfee reference about installation of ENS on Mac – KB89728
To learn – How to Install McAfee agent on Mac?
In conclusion hope this post helps to deal with Upgrade or Install of McAfee ENS on Mac OS. If there are any queries or feedback post them underneath. Will get back to you as quick as possible.